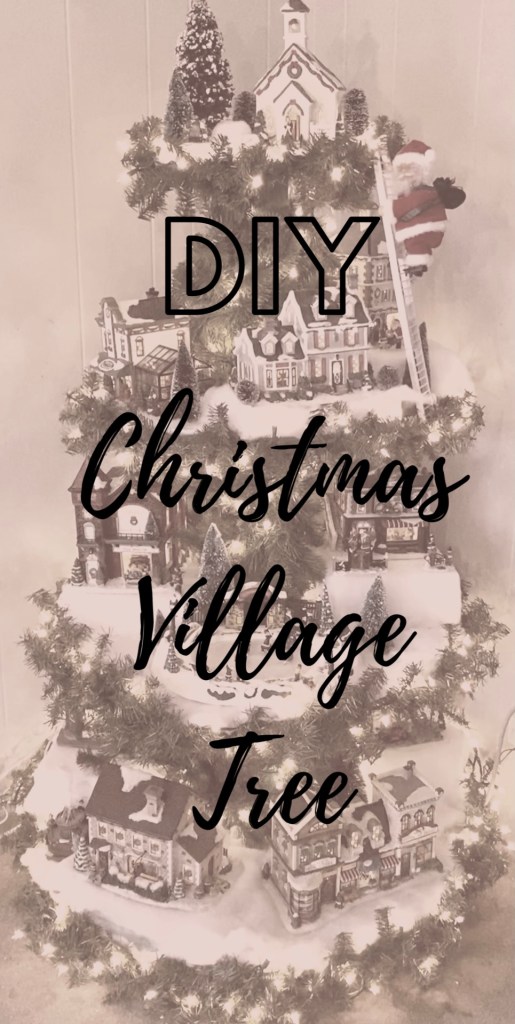
Hey there! If you have never known I had a blog it was because I started it almost 3 years ago…wrote an introduction and then NEVER wrote in it again. To be honest, I was afraid to fail. (Can you even fail at a blog? Don’t answer that.) Not all posts will be start with my life story, but I promised myself I would start posting in here more regularly with travel updates (lol 2020), crafts, DIY projects, and various plans. If you are looking for recipes, this is NOT the place for you. My specialties regarding food include eating it and ordering take-out. So without losing your focus anymore than I already have, let’s get to those DIY Christmas Village Tree Plans.
Materials Needed:
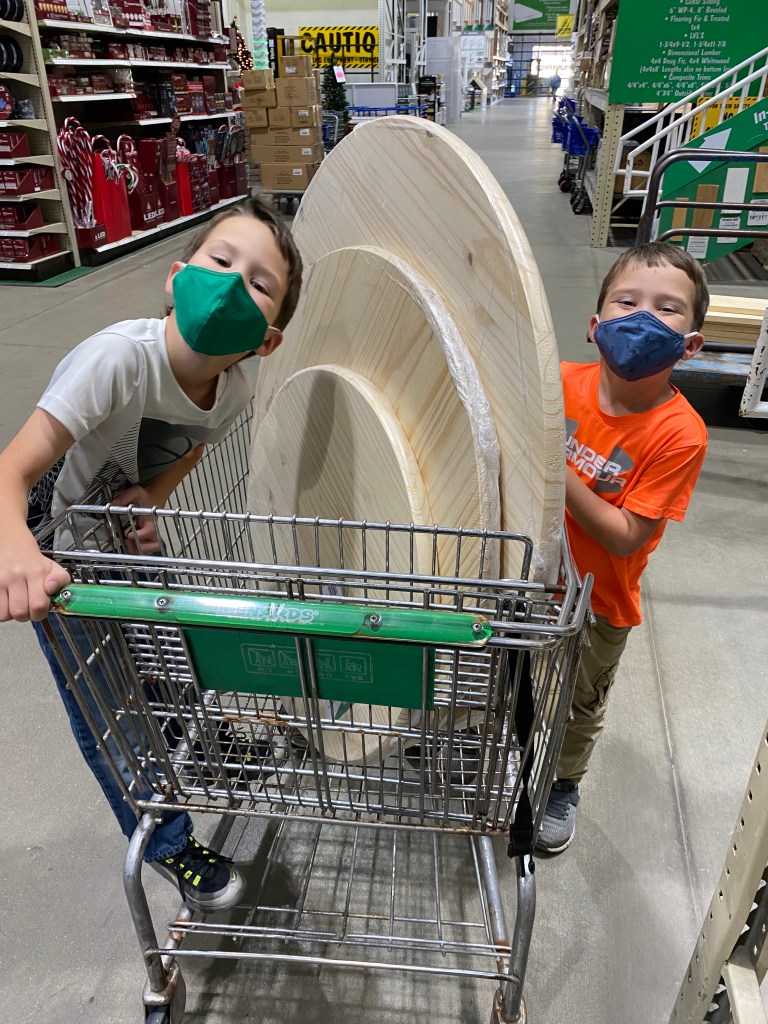
- Wooden Rounds 5/4″ thick in 36″, 30″, 24″, and 18″ widths
- One Untreated 4″x4″x6′ board
- Two Untreated 2″x4″x8′ boards
- Minimum of 60′ of basic garland
- 200 lights
- Rust-Oleum Satin Hunter Green Spray Paint
- 3″ screws (I used 3″ T25 Torque Multi-Purpose Screws)
Optional Materials:
- Flat Faux Snow Blanket
- Wood Adhesive
- Fluffy Faux Snow
- Two cute boys to “help” you through Menards and Lowe’s where most of the male species looks at you like you’ve either lost your mind (which I have) or says something along the lines of: “You need help there little lady?” (which I don’t. ;))
Step 1:
For any project I have, I prefer to make all of the cuts I have to do first. Cut the 4″x4″x6′ board down to 56″. Use the leftover 4″x4″ to mark out a square in the center of each of the wooden rounds except for the smallest one, the square should be close to 3 3/4″ x 3 3/4″. Drill a hole in all four corners of the marked out square and use a jigsaw to cut out the square. Tip: Place the wooden round on top of a trash can while making the square center cut to reduce sawdust and minimize clean-up time. Cut your 2″x4″ boards into: TWO 27″ cuts, TWO 16″ cuts, and FOUR 6″ cuts. You will also need FOUR 11″ cuts mitered 45o angles on both ends.
Step 2:
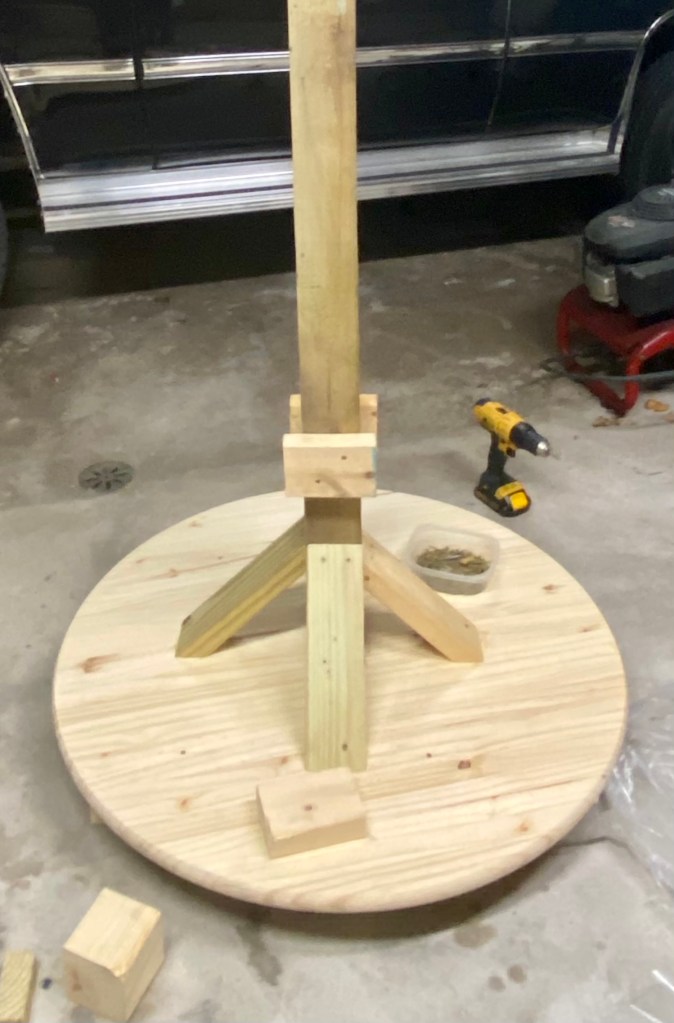
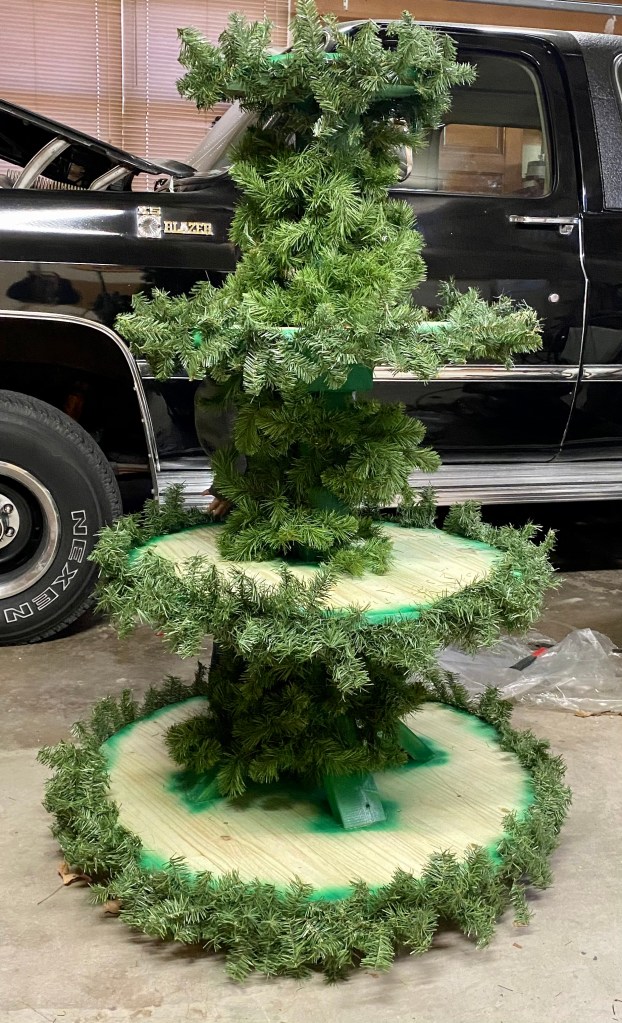
Make the base for the bottom 36″ wooden round with the TWO 27″ pieces and the TWO 16″ pieces of 2″x4″. Attach the TWO 16″ pieces to opposite sides of the base of your 4″x4″ center piece of wood. Next, attach the 27″ pieces to the ends of the 16″ pieces forming a base for the 36″ round to be attached to. Place the 36″ round around the 4″x4″ through the square that was previously cut in the center of the round. Attach the 36″ wooden round to the base constructed of the 27″ and 16″ boards. Once this is done, you will attach your FOUR 11″ mitered 2″x4″ pieces to the top of the 36″ wooden round and to the 4″x4″.
Step 3:
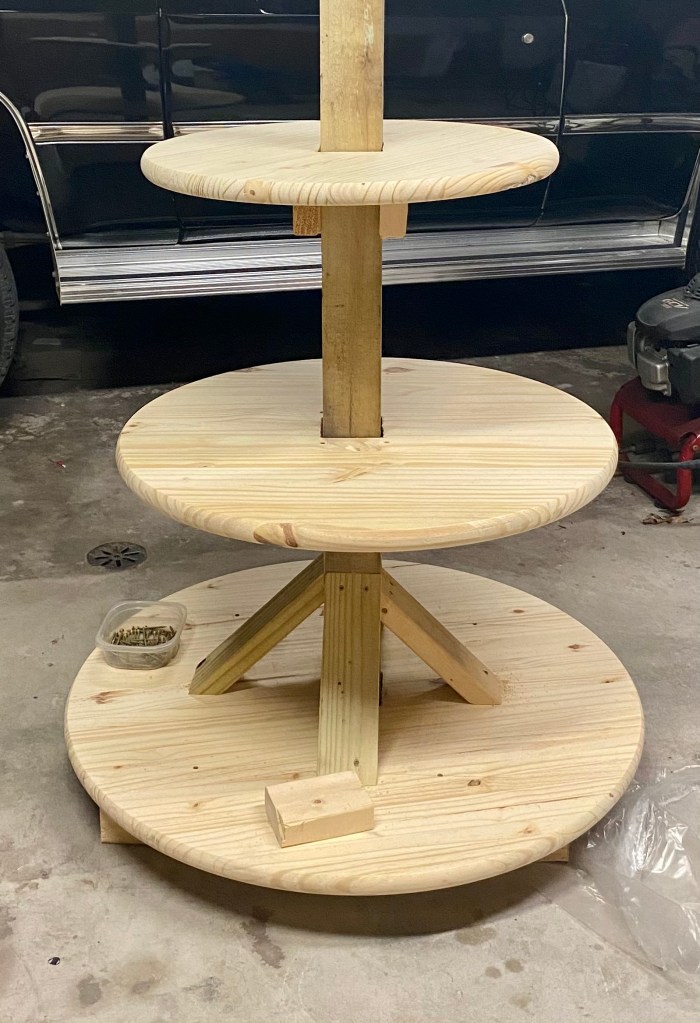
Measure 16″ from the top of the 36″ round on two opposite sides of the 4″x4″. Attach TWO of the 6″ pieces of 2″x4″ level with the top of the 2″x4″ at the 16″ line. Place the 30″ round onto the TWO 6″ pieces and attach it to them. I used FIVE 3″ T25 torque screws in each 6″ piece while attaching it to the 4″x4″ center. Probably overkill, but I wanted to make sure that it would support my wooden round and most importantly the ceramic houses. Repeat this step by measuring 16″ from the top of the 30″ round and marking two opposite sides of the 4″x4″, and attaching the other TWO 6″ pieces to support the 24″ wooden round.
Step 4:
Attach the top 18″ wooden round to the very top of the 4″x4″, I also used FIVE 3″ T25 torque screws for this as well. Again, probably overkill, but it’s very sturdy and that’s my number one priority. Spray paint the edges and the center with green spray paint. A basic spray paint job is all that’s necessary. Once dry, use a heavy duty staple gun with 1/2″ staples to attach the lighted garland to the edges of the wooden rounds and wrapped around the center post.
Optional Step 5:
Use Wood Glue/Adhesive and attach a faux snow blanket to the top of each wooden round. Very simple and covers anywhere you might miss with the fluffy faux snow when you start to put your Christmas village houses in place.
Step 6:
Decorate to your hearts content and don’t let anyone tell you it’s too early for Christmas decor, you don’t need that kind of negativity in your life. 😉

Stay tuned for more Christmas crafts and project DIY’s to come!

This is amazing!! I’m trying to make a display from an old ladder I had found. But this one takes up less space! I love it!
LikeLike
Thank you! I have seen the ladder idea as well, but I have two little boys who would flip those boards like a seesaw faster than you can say “Christmas Village”! Let me know how yours turns out!
LikeLike